My Photovation Challenge Week 2 | Contrast

Our My Photovation weekly photography challenge is aimed at helping us sharpen our photography skills. But, it’s not just about us. We want anyone who is interested in getting better at photography to join in.

Whether you’re shooting with a DSLR, point-and-shoot, or a smartphone this challenge is for you. Like what Matt wrote about in his last post, you don’t need fancy equipment, you just need to take photos!

So, don’t be shy! Join in at anytime! You can search #MyPhotovation and see examples from other people who have contributed. If you wish to join our challenge, just use #MyPhotovation on Twitter or Instagram.

This week’s theme for the My Photovation Challenge is: contrast.

Contrast is an important tool for a photographer. It serves compositional tool that adds interest and allows you to direct the attention of the photo to the subject.

There are a lot of different types of contrast.

  • Tonal contrast
  • Color contrast
  • Light contrast
  • Texture contrast
  • Size contrast
  • New and old
  • Still and moving
  • Young and old

Tonal and color are probably the most popular and well known forms of contrast.

In preparing this post, we realized that contrast was a weakness for both of us as photographers. Going through our archives we realized we didn’t have many examples other than tonal contrast.

Tonal contrast is about the darkest and lightest elements of the photo, and the grey areas between.

It’s important to black and white photography. As Tab mentioned in a post a while back, black and white are great at conveying emotion. Contrast can impact what kind of emotions you bringing out in your photo. A high contrast image will be stark and dramatic, while a lower contrast image can have a lighter, airy feel.

For example, your subject often determines the mood, or emotion you will want to convey. A dramatic portrait of an individual, a mountain, a piece of impressive architecture, these you would want to create a more powerful, dramatic mood. Silhouettes are a great way to practice this one!

Examples of high contrast black and white images:

IMG_0408

A dramatic, thought-provoking portrait of Matt © Tabitha Friesen

IMG_8350-2

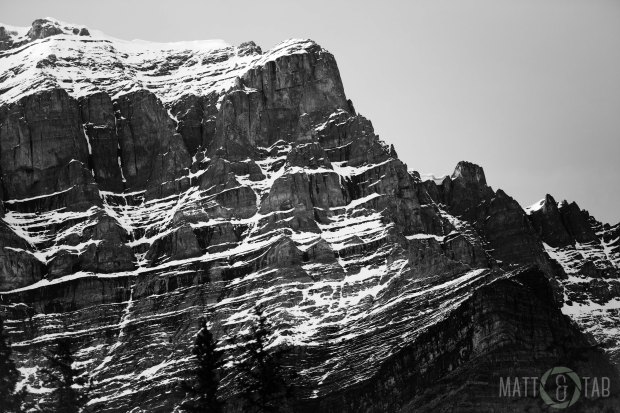
Close up of one of the Ten Peaks at Moraine lake © Matthew Friesen

Tel Aviv-1667

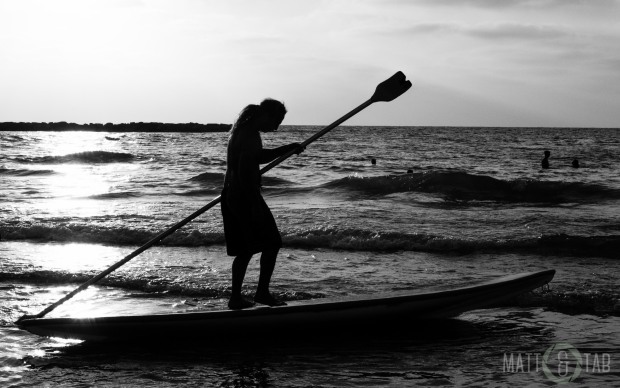
A silhouette of a man on a paddle board, at Tel Aviv beach © Tabitha Friesen

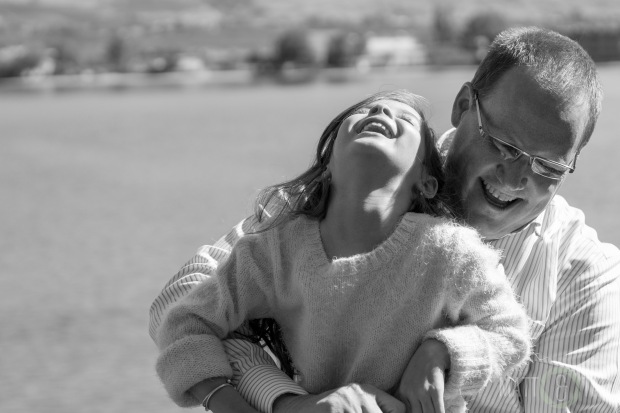
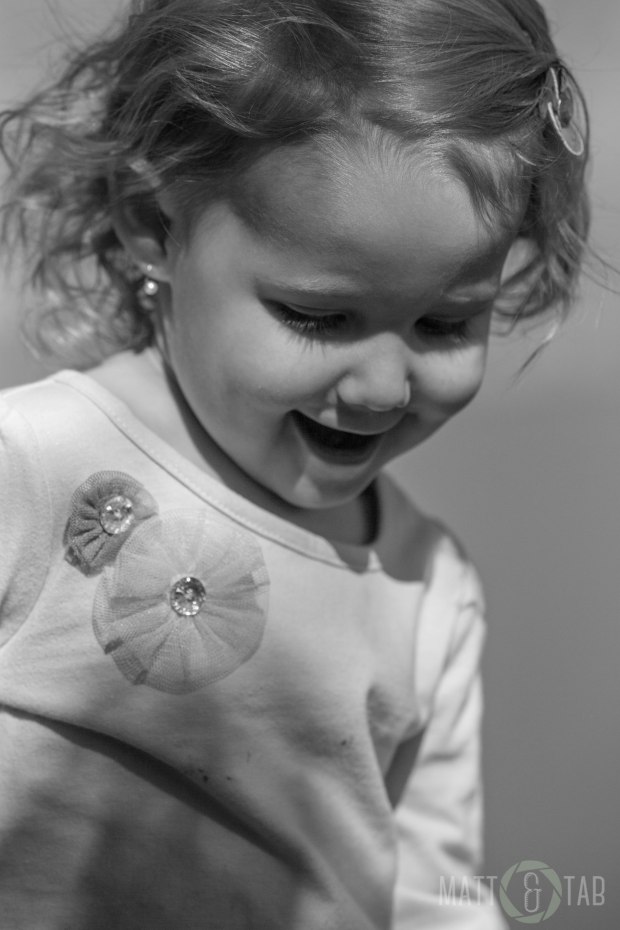
Low contrast images are great for portraits where you want the mood to be softer and lighter. For instance if you are photographing people laughing, or a child playing having a lower contrast image may be best.

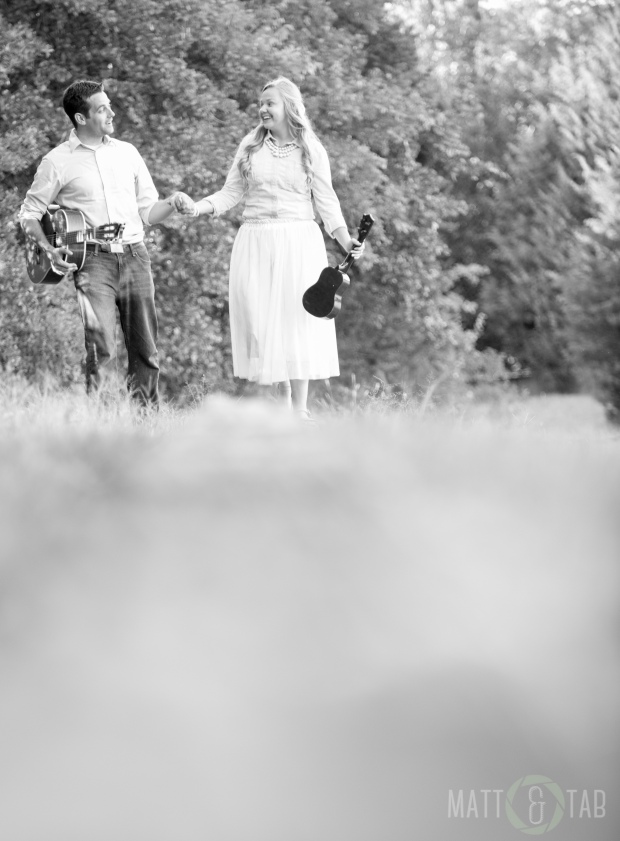
Examples of low contrast black and white images:

20140831-Jeremiah Breanna engagement_D3S7558

© Tabitha Friesen (2014)

IMG_8625-2

© Tabitha Friesen

IMG_8870

© Matthew Friesen

So that’s tonal contrast! The rest of this week we will be working on strengthening our ability to capture the other types of contrast. These different types can create really striking images that not draw the viewer into the photo, but into the story. It will probably take us more than a week to get this technique down, but it is well worth the try.

Other important types of contrast to remember:

Light
Texture
Size
New and old
Still and moving
Young and old

Do you have a favorite type of contrast? Is it something you think you need to work on as a photographer? Join our challenge this week! Post your contrast photos on Twitter or Instagram using #MyPhotovation!

Thanks for reading!

-Matt & Tab

Photovation Challenge Week 1 | Light

By Tab

This photo challenge is all about the basics! We are starting out with light, because, well, light is photography.

Random House Kernerman Webster’s College Dictionary defines photography as: “The process or art of producing images of objects on sensitized surfaces by the chemical action of light or of other forms of radiant energy.”

Photos are produced from light! I don’t know about you, but I personally have not even thought to come up with “other forms of radiant energy”. But, I don’t have to. Because of light.

“Lighting is a key factor in creating a successful image.”
Shaw Academy, The Importance of Light in Photography

Anyone who has taken a photo, whether by a big expensive DSLR, Kodak disposable, tiny point and shoot, or their phone knows that light is essential photo making.

Good light can mean the difference between boring and interesting.

Photos lacking interesting light:

The same subjects, with interesting light:


“Light makes photography. Embrace light. Admire it. Love it. But above all, know light. Know it for all you are worth, and you will know the key to photography.”
George Eastman, Founder of Eastman Kodak Company

Light can be natural or artificial. It can be manipulated, transformed, and enhanced. Knowing how to use both is knowing the “key to photography.” Natural light can be powerful and stunning, or soft and graceful. I’ve always loved using natural light. For years I disdained the thought of flashes. I thought they were a hindrance and unnecessary for a good photographer (Oh, how vain and ignorant!)

Then I married Matt.

Matt has learned a lot about lighting from years of research and practice. Since Matt and I have been working together, I’ve been learning more about artificial light. He’s also helping me learn how to combine natural and artificial, and how to utilize the camera’s settings. It’s a learning process, but cameras are really smart! Well, they are as smart as you tell them to be, anyway.

“Photography is literally writing with light.”
-David Hobby, Strobist: Lighting 101

The photos in today’s post are mainly about natural light. The rest of this week I plan to focus on artificial light.

Learning to use artificial light is one of my goals as a photographer. Since I’m a full-time homemaker and I tend to stay indoors much more in the I wanted to use this week’s challenge to play with artificial lighting more.

Homes can actually have amazing natural light coming in through doors and windows. But, when it’s not there it can force you (me) to learn to create the light you want.

If you want to join this week’s photo challenge use #MyPhotovation when posting your “light” photos on Twitter or Instagram!

Thanks for reading!

Hiking at Mt. Kobau

After a few days in Osoyoos, a friend of ours asked us to join him for a drive up a nearby mountain to check out some of the hiking trails at the top. Eager to get outside and experience something new, we accepted.

We left town, the vineyards, the fruit stands, and went on a new road we hadn’t been on yet. We drove past spotted lake (no pictures, sorry), and came across some ranch land at the base of the mountain. We turned onto a gravel road and began our ascent.

The sun's rays illuminating the dusty gravel road. © Tabitha Friesen

The sun’s rays illuminating the dusty gravel road. © Tabitha Friesen

The dusty road twisted and turned up the forested peak. Around one corner you’d see a wide open view of the valley below, the next you’d be face to face with a wall of pines, another turn, black, bare trees and a layer of ash.

A few weeks before our visit, parts of Osoyoos and neighboring towns were damaged by forest fires. We had seen clear evidence of this since we first arrived, blackened shrubs and trees bordering vineyards and orchards and wispy pillars of smoke on far off peaks. Now we were right next to some of the damage.

We all agreed that it was sad to see so much destruction, but it was also amazing to see how much was still alive. There would be an unscathed, green tree right next to one that was completely burnt. In some places you could see the line of where the fire raged, and where it didn’t touch. Our friend remarked how in a year or two, it would be lush and green again, as fires often bring on new life after their destruction.

We arrived at the base of the hiking trails at the top. We looped around a couple different trails. One trail the fire damage was everywhere, the other looked completely untouched.

The rest area at the starting point of the two trails, along with some curious cows. © Matthew Friesen

The rest area at the starting point of the two trails, along with some curious cows. © Matthew Friesen

We spent less than an hour hiking around the trails, leaving just as the golden light was entering the scene. It was a great trip. We enjoyed the fresh air, mountain views, and good conversation. I mean, who wouldn’t?

Golden hour shadows. © Tabitha Friesen

Golden hour shadows. © Tabitha Friesen

PHOTOS FROM MT. KOBAU: 

(Click the image for a bigger view)

Photo Friday | Moraine Lake

A panoramic view of Moraine Lake at golden hour from above. © Matthew Friesen

Matt’s favorite from Moraine Lake. A panoramic view of the Valley of the Ten Peaks, at golden hour, from a rock pile above. © Matthew Friesen

(Click the image for a bigger view)

Like this photo? See more from Moraine Lake here. Leave your comments below! Have a great weekend. Thanks for stopping by!

-Matt & Tab

Two red chairs side by side at the top of the Mt. Norquay viewpoint

Discovering Banff | Part 2 | Mt. Norquay Road

After our first visit to Banff, we spent over a week in Osoyoos (you’ll hear about that soon). We originally planned to drive straight home after our stay in Osoyoos, but after our experience with two 7-8 hour trips (and an enjoyable time in Banff!) instead of one 14-16 hour trip, we decided to stay in Banff on our way home too.

We got in late, it was gloomy and rainy, we were tired, so we just went to the hotel. Matt had done some research on Mt. Norquay road (conveniently located right behind out hotel) and he wanted to check it out the next morning.

Sunrise above Mt. Rundle from our room at the Juniper Hotel. © Tabitha Friesen

Sunrise above Mt. Rundle from our room at the Juniper Hotel. (Taken with Samsung Galaxy s4 Mini) © Tabitha Friesen

Sunrise was fairly late in the morning, so we took advantage of the extra Zzz’s.

Tab peeked out our window and saw a stunning pink and purple sunrise. Light and color bounced off the dark, moody clouds lingering from the day before. Unfortunately, she only had her phone camera. She snapped some pics, then we snatched up our luggage and headed out. In 10 minutes we were at the viewpoint.

Hello sunrise! © Tabitha Friesen

Good morning, Banff! © Tabitha Friesen

We arrived just as the morning sun was saturating the clouds with a fiery orange glow. There were three others already there, a cute Asian couple (the man had a camera in each hand) and a man with a leather jacket and hat with his Sony camera perched on a tripod.

Some of the other visitors. © Matthew Friesen

Some of the other visitors. © Matthew Friesen

Matt changed to his 35mm lens for a wider angle and Tab went to the edge of the road to get a better view of the grassy slope below.

Her eyes filled with glee, she wanted to squeal, and she tip-toed back to Matt as fast as she could.

“MOUNTAIN GOATS!”

Matt asked where they were, and changed his lens back to the 70-200mm so he could zoom in on the herd of goats.

(Click the image for a bigger view)

Turns out they were bighorn sheep. But, they were the first wildlife we had seen, so Tab got excited.

We spent about half an hour taking photos and enjoying the last bit of fresh mountain air we would experience for a while. Just before we left, the sun’s rays graced the tips of some of the stately peaks,  crowning them with glorious, golden light. It was truly a wonderful piece of art to behold.

Photos from Mt. Norquay viewpoint:

(Click the image for a bigger view)

We drove back down the winding road, checked out of our hotel, and after the essential stop at TImmy’s for a dark roast and breakfast (Yay turkey sausage and egg english muffin!) we set out for home. 

So, have you ever been to Banff? Do you love mountains? Sunrise? Trees? Sheep? Timmy’s?Leave us your comments below!

-Matt & Tab